Earlier this week, I promised to share with you how I made our Christmas stocking last year. It was a fun affordable way to get a custom look. I hope you try it for your own home!

Step One: I took some leftover suede fabric (I used it to make lumbar pillows for chairs in my family room), and had it monogrammed with our names. I chose chocolate for the lettering just to keep it neutral. For those local, I had these done at Smith's Variety.

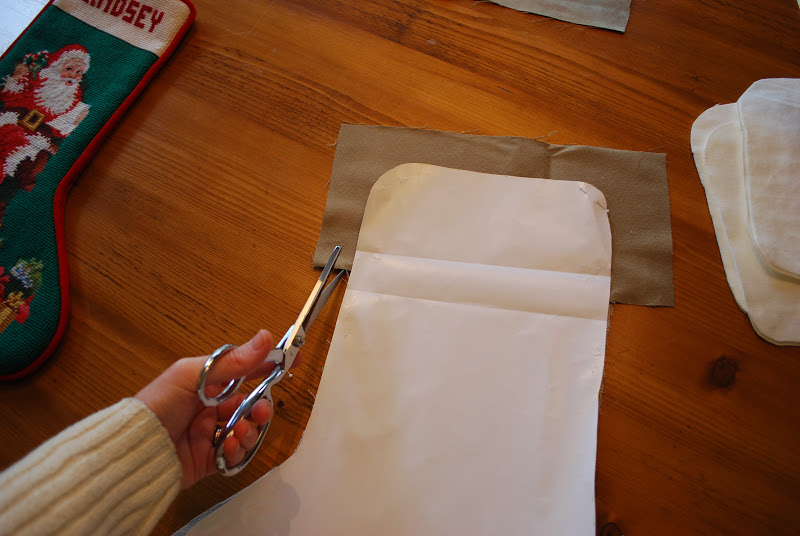
Using one of our stockings from the previous year, I created a pattern from leftover wrapping paper (see all that red in that paper - told you!).

Using the pattern, I cut out one linen "back" for the stocking.

Then I folded down the header of the pattern and cut out one linen "front" for the stocking. If you want to make this easier, you can simply cut out two linen pieces of the same size and simply overlay the monogramming on top of it.

Then using a liner fabric (I used a thick cream cotton), cut out two liner stockings. These will be inside the stocking and help to finish all the edges nicely.

Once you get your monogramming complete - with same sides together, sew the bottom of the monogrammed piece to the top of the front linen stocking.

It will look like this (and yes, I did make one for our cute dog, Lottie).

Then using a wide satin ribbon, pin it to the stocking (making sure to center it on the seam you just created).

Then top stitch the ribbon to the stocking on both edges.

Place your pattern on top of what you have sewn so far and trim off any excess fabric.
You now have the finished front of the stocking. It will look like this. Just an aside, it would have made the sewing so much easier if I had not rounded the top of the stocking. A straight line across the top and down the sides would have been much, much easier.

Now it's time to attach the liner to the linen pieces. Place one liner piece on top of your finished front.

Also place a liner piece on top of your linen back stocking piece and pin these together at the tops only. Once pinned you will sew these together just at the tops on both pieces (this is where it would have been easier had it been a straight seam. Then you will open them up to reveal this seam.

Both front and back will look like the picture below. Now it's time to sew the two long pieces to each other along the sides. I the image below I have sandwiched the pieces together. The bottom piece is the liner and back linen (sewn together at the tops) and the top piece is the liner and front linen piece sewn together at the top. So, to be clear

Here's a close up of the one place where you will not sew them together.

Once sewn together, you will reach into the opening and pull the stocking out so that the right (or correct) sides are showing. Much like "righting" a sock before throwing it into the wash (that never happens around here!! Ha!).

Here's a picture of me reaching inside to "right" the stocking.

I took several pictures of this because it is one of my favorite parts about sewing. I always think - Wow, It worked!

Once you've pulled this stocking through, all you need to do to finish it is whip stitch the opening in the liner closed. Remember this does not have to be pretty because it will be buried inside the stocking.

Now, last step! You need a loop to allow you to hook the stocking onto the mantle. Rather than making this hard, I decided to use leather string. I think it adds some interesting texture too.

I cut even lengths of leather (so that all the stockings would hang at the same level), and I tied a decorative knot on both ends of each piece.

Then, using a sewing marker (which disappears when you wet it), I made two even marks on each stocking where I wanted to sew the leather strips.

You could do this part by hand, but I'm lazy and wanted to use the machine. So to do this, you will need to select a zig zag stitch on your machine and drop your feed dogs (which will prevent the fabric from moving), and stitch back and forth in one single spot over the leather end. You will do this for each of the two knots on the stocking.

If you look closely you can see where I did this. I used the clear monofilament thread to make it less noticeable in the finished product.

Here are all five (including Lottie!) finished stockings.

And here is how it will hang from the leather strips.

I know this sounds like a lot of steps. But once you get one under your belt, you can easily get the others finished. M.


