Hope everybody had a marvelous weekend! The whirlwind is almost upon us. Deep breaths. I'm really hoping this early Thanksgiving will make things a bit less stressful for everyone. Remember, we have a whole week afterwards before the month of December!!
So, today, I'm deconstructing the cover of Birmingham Home and Garden. Most of you know my house made the cover of the December issue of Birmingham Home and Garden (jumping for joy inside!!!).

If you didn't know, you've not been reading my blog. Honestly, I've been talking about it incessantly. It could be worse - be glad you're not my husband (poor thing, he's now resorted to just nodding and smiling when the conversation naturally flows back to this topic)! In all seriousness, with the subscriptions delivered, I'm getting lots of great questions about the space. So, I thought I would answer them here on the blog for everyone!
Artwork
First, the wonderful artwork over my mantel was done by a very talented artist from Mobile, Alabama, Ashley Terrell. I simply adore her! I got to know Ashley through a close friend/client who hosted a house show highlighting her work. Here's the very first post I did on Ashley's artwork. Here are a few of her most recent offerings. . .

Ashley's work has been featured in lots of galleries as well as one of my favorite shops in all of NOLA - Shaun Smith Home. My favorite things about Ashley - Her work will add a refreshing modern feel to any space. But it is done in such a way that it blends beautifully with traditional furnishings. That is a tall order! If you've ever tried to blend modern artwork in a very traditional space, you know exactly what I'm talking about here. Secondly, her work is affordable (sshhh, don't tell), but you would never know it! If, like most people, your home is filled with tiny treasures, now's the time for a statement piece. Contact Ashley. You will not be disappointed.

Overall Color Scheme
It was harder than I thought! I made this snap decision right after Christmas the year before to take out all the red decorations in our home.

During the Christmas holidays of 2010, I was looking at a magazine of a gorgeous tree with no red and thought, I'm totally doing that next year. I did not think about all the things this affects - the stockings, tree skirt, ornaments, even down to my wrapping paper.
 image via Mandi Smith T Interiors
Completely changing the color scheme of your Christmas decorations is truly like changing the color scheme of your room. It's a huge undertaking. I loved the results and will be doing it again this year (now that I have the decorations). But you need to really think about it before jumping in!
 image via Mandi Smith T Interiors

image via Mandi Smith T Interiors
During the Christmas holidays of 2010, I was looking at a magazine of a gorgeous tree with no red and thought, I'm totally doing that next year. I did not think about all the things this affects - the stockings, tree skirt, ornaments, even down to my wrapping paper.

Completely changing the color scheme of your Christmas decorations is truly like changing the color scheme of your room. It's a huge undertaking. I loved the results and will be doing it again this year (now that I have the decorations). But you need to really think about it before jumping in!

The Tree
The most important thing about selecting the perfect fresh tree is to get the biggest one your space pocketbook will allow and make sure it has a straight trunk. The fatter the tree, the better it will look (trust me on this). Measure your space. If you show up at the Christmas tree lot without a measuring tape, I'm calling you out as a rookie! Also, if the trunk of the tree is in the least bit crooked, it will not be straight in the stand, and your results will not be the same.
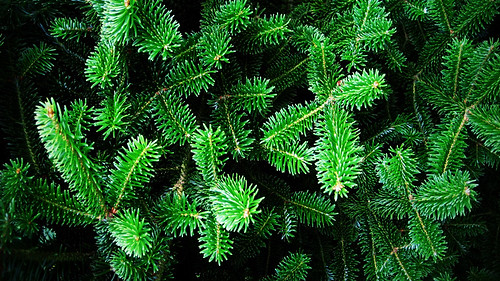
My favorite tree for decorating is the Fraser Fir - it has soft needles (so no sticking you when your covering it in lights), and it will stand up to heavy ornaments. With that said, I also love the look of what I call a Charlie Brown Christmas tree. We have some dear friends who always include one in their dining room. It is so beautiful and (believe it or not) elegant with the bare limbs and all their gorgeous ornaments. Sort of like this one, but on a much larger scale . . . (you can see the trunk the entire length of the tree).

As for lights, whether you do white or colored lights, buy twice as many as you think you'll need (yes, double). I start with a thick layer on the inside of the tree first. Then, I do the lights on the outside of the tree. For both layers, I work in "pie shaped vertical" sections from top to bottom (not around and around). This will make the "de-decorating process" so much easier. Last tip here, every time I add a strand of lights, I step back and squint my eyes and look at the tree. With this trick, you will instantly see the dark spots where you need to add more lights. It's tedious. Christmas music really helps!!
Last year, my son helped me with the lights; and I really don't think I could have done it without him. Hoping he's in the mood to do it again this year!
Last year, my son helped me with the lights; and I really don't think I could have done it without him. Hoping he's in the mood to do it again this year!

One of the biggest questions I've been getting is "Where did I get my ornaments?" After Christmas I shopped all the higher end places in town, including florists for those mega %75 off sales. Then, at the beginning of the next Christmas season, I went to Walmart (yes, I did!) and snagged all the new great ornaments I could find (mainly white snowflakes, angels and reindeer). I was very picky about which ones I purchased. When you blend these in with other more expensive ornaments, they too begin to look more expensive.
For the ribbon, I did not skimp here. I used high end ribbon in three different textures and widths - double sided satin in green, double sided satin/organza in gold, and a super wide burlap in chocolate. Again, this will make the entire tree look more expensive.
For the ribbon, I did not skimp here. I used high end ribbon in three different textures and widths - double sided satin in green, double sided satin/organza in gold, and a super wide burlap in chocolate. Again, this will make the entire tree look more expensive.
The Stockings
I'm saving this topic for now. I will be posting a tutorial on how to make the stockings later this week. So, stay tuned.


Clove Oranges

This was a fun, sweet project I did with my daughter. Each year, my husband buys a case of oranges from a friend who sells them as a fundraiser. They arrive just in time for Christmas.

image via Mandi Smith T Interiors
I make lots of fresh orange juice with them. We use them in orange things (click here for an explanation). I cut sections and put them in salads and steep slices with other spices on the stovetop. And we clove a few (there are a ton of them, so you have to be creative). This is a fun thing for small children to do with you. I buy a large jar of whole cloves, and a box of toothpicks. Then use the toothpicks to create a pattern on the orange (this makes it easier to insert the cloves too). Once the pattern is complete, fill in with the cloves. It makes the room smell wonderful!
Paper Whites
Sorry I don't have a close up picture of the paper whites. Several people have asked me where I got them and about the container they're in. Narcissus or paper whites are a quintessential flower in our house at Christmas. They have the most wonderful honey fragrance that mingles with the evergreen that is unmatched by any candle! The other great thing about these - they go with any color scheme you select for Christmas. You can start your own now from bulbs or cheat a bit and buy them already blooming from your florist - locally I love Davis Wholesale. I confess, I bought them blooming and tucked them into a rustic wooden container I've had for years. I think I got it at Home Goods at some point for under $30 dollars.

Photo Shoot Process/Photographer
All the images for the magazine were taken by the talented Jean Allsopp. She is a dream to work with on projects. Although she has an amazing eye for the perfect angle and lighting for the shot, she is so down to earth and fun! No stuffy photographer here. This picture truly captures her personality!
 via
via
All images of my home in this post (except the cover shot) were taken by me after the photo shoot and simply do not do Jean's images justice. Although my home was featured on the cover, there is an entire article highlighting a home I decorated for a client for the holidays. A big thanks to the Agnews for allowing us to photograph it, and a big thanks to Birmingham Home and Garden for featuring it. The article includes lots of images from the Agnew's home with how to steps on recreating these decorations in your own home - completely different from what I've shared here. So, you need to buy the magazine to see them! M.
All images of my home in this post (except the cover shot) were taken by me after the photo shoot and simply do not do Jean's images justice. Although my home was featured on the cover, there is an entire article highlighting a home I decorated for a client for the holidays. A big thanks to the Agnews for allowing us to photograph it, and a big thanks to Birmingham Home and Garden for featuring it. The article includes lots of images from the Agnew's home with how to steps on recreating these decorations in your own home - completely different from what I've shared here. So, you need to buy the magazine to see them! M.


